Door Threshold and Frame Detail: What It Actually Shows
A plain-English walkthrough of what a door threshold and frame detail communicates, with real DWG plans you can open alongside it.
Saumyajit MaityUpdated 20 July 202610 min read

Why a plan view alone never tells the whole door story
I've laid dozens of door blocks into live floor plans over the years, and the moment that always trips up a junior drafter is thinking the plan symbol is the whole picture. A plan view of a door, the kind you get in almost every download on this site, shows you the leaf width, the swing arc and which way it opens into the room, and that's genuinely most of what a floor plan needs. But it tells you nothing about what happens where the door actually meets the floor, or how the frame is built into the wall around it, and that's exactly the gap a threshold and frame detail is drawn to close.
A construction detail is a larger-scale drawing, usually a horizontal or vertical section cut right through the opening, that zooms into the parts a plan can't show at 1:50 or 1:100. Think of the plan as the map and the detail as the close-up photograph of one specific junction on that map, the sill, the jamb, the head, drawn at a scale like 1:5 or 1:10 where every layer of material actually gets its own line weight and hatch.
On a real project, the door plan and the door threshold detail live in different drawings but they have to agree with each other completely, the leaf width in the plan has to match the rebate width in the detail, and the swing direction has to match which side the frame stop is on. That's the single habit worth building early: never treat the plan symbol and the detail as separate pieces of information, treat them as two views of the exact same physical object.
The other thing worth understanding early is who actually produces each drawing on a real project. The architect or the drafter laying out the floor plan usually places the door as a generic plan symbol at this stage, width and swing only, because the exact frame profile, sill material and fixing method often aren't finalised yet. The threshold and frame detail typically gets developed later, sometimes by a different person entirely, once the door supplier and the specific frame system are chosen. That gap in time is exactly where mismatches creep in, a plan drawn early with a 900mm opening and a detail drawn later against an 850mm frame that got substituted for cost reasons, for instance, so checking the two against each other before anything goes to site is not a formality, it's the single most common coordination failure on this particular junction.
The threshold: what's actually being drawn at the floor
The threshold is the horizontal element right at floor level under the door, and depending on the door type it's doing a few different jobs at once. For an internal door it's often just a transition strip covering the gap between two different floor finishes, tile on one side and timber on the other, for instance, so the detail at that point is mostly about finish thickness and a small chamfer so nobody catches a toe on it. For an external door the threshold has to do real weatherproofing work too, and that's where the detail gets denser: a raised sill to keep water out, a drip groove or throat cut into the underside so rainwater doesn't track back under the frame by capillary action, and a slope away from the building on the exterior face.
When you're actually drawing or reading one of these, the things worth checking every time are the finished floor level on both sides of the opening (they're not always the same, especially at an external door where there's often a small step down), the sill material (timber, stone, aluminium and precast concrete all behave differently and get drawn with different hatch patterns), and whether there's a damp-proof course tucked in under the sill, which on a section will show up as a thin dashed or hatched line that's easy to miss if you're skimming.
The catch here is that a threshold detail that looks fine on paper can still let water in if the slope or the drip groove is missing, so when you're checking a set of details rather than drawing your own from scratch, that's the first thing worth zooming into.
Accessible thresholds add another layer worth understanding on top of the weatherproofing question. Wherever step-free access matters, entrances used by wheelchair users, prams, or anyone who can't manage a raised lip, the detail needs to show a level or near-level threshold instead of the traditional raised sill, which usually means the weatherproofing job has to be done differently, a recessed drainage channel just outside the door, or a carefully sloped hard-landing area outside rather than a raised lip doing the work. This is one of the clearer places where the general principles behind universal design and accessibility actually show up directly in a construction detail rather than staying abstract, and it's worth checking on any public or commercial entrance detail specifically, because a beautifully drawn raised sill is the wrong answer if the brief calls for step-free access.
The frame and jamb: how the door actually sits in the wall
Move up from the threshold and you're looking at the jamb, the vertical part of the frame running up each side of the opening, and the head, the horizontal piece across the top. In plan view (looking straight down), the jamb detail shows you the frame profile in section: the rebate where the door leaf sits, the stop that the leaf closes against, and how the frame is fixed into the rough opening in the wall, usually with a gap packed with insulation or mortar and covered by an architrave or trim on the finished side.
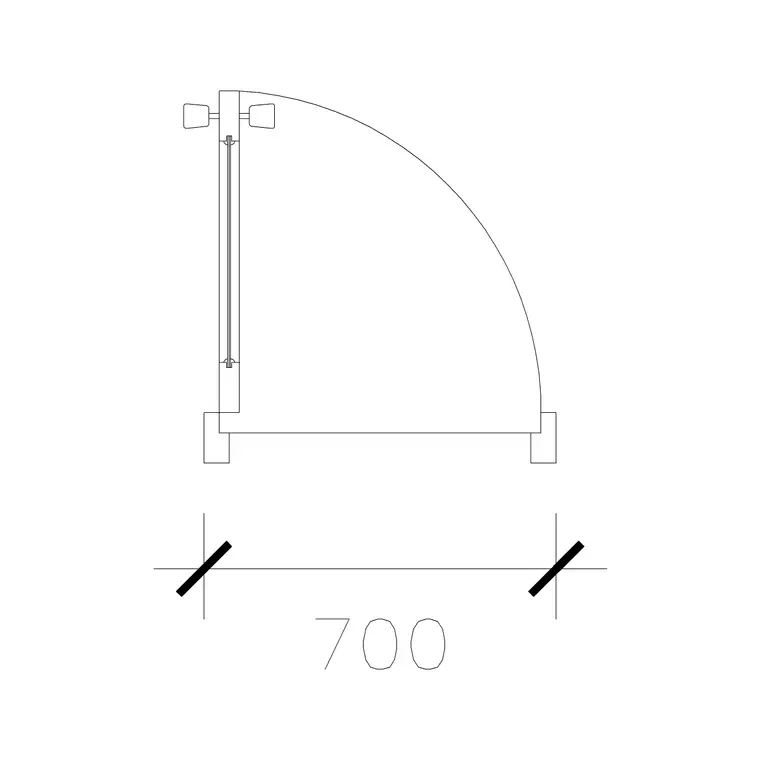
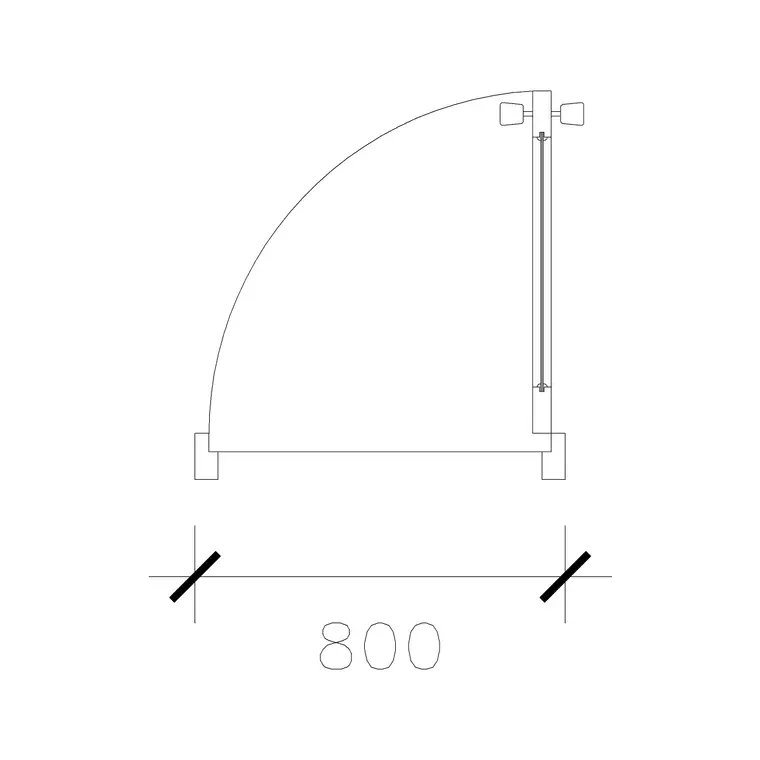
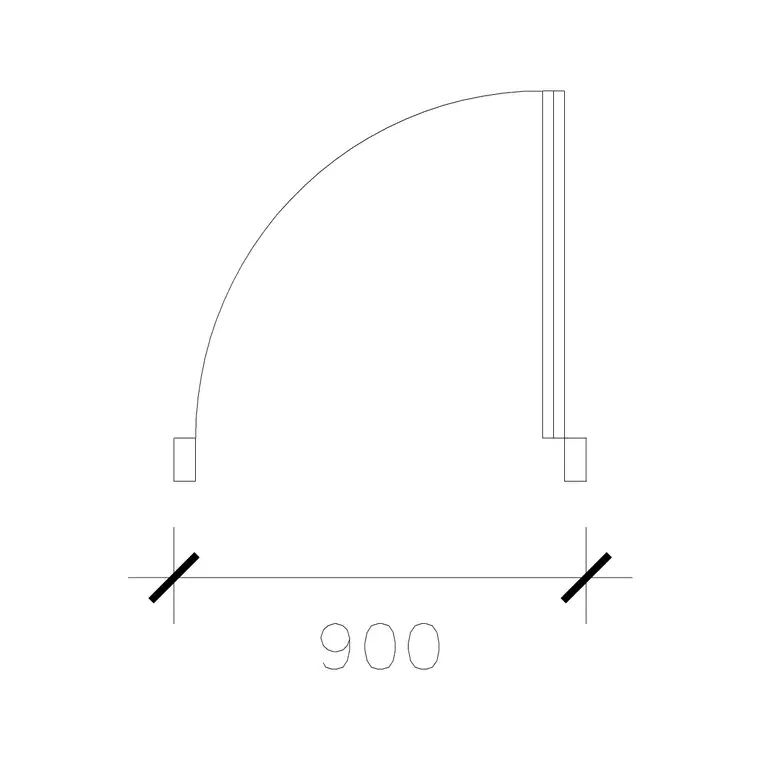
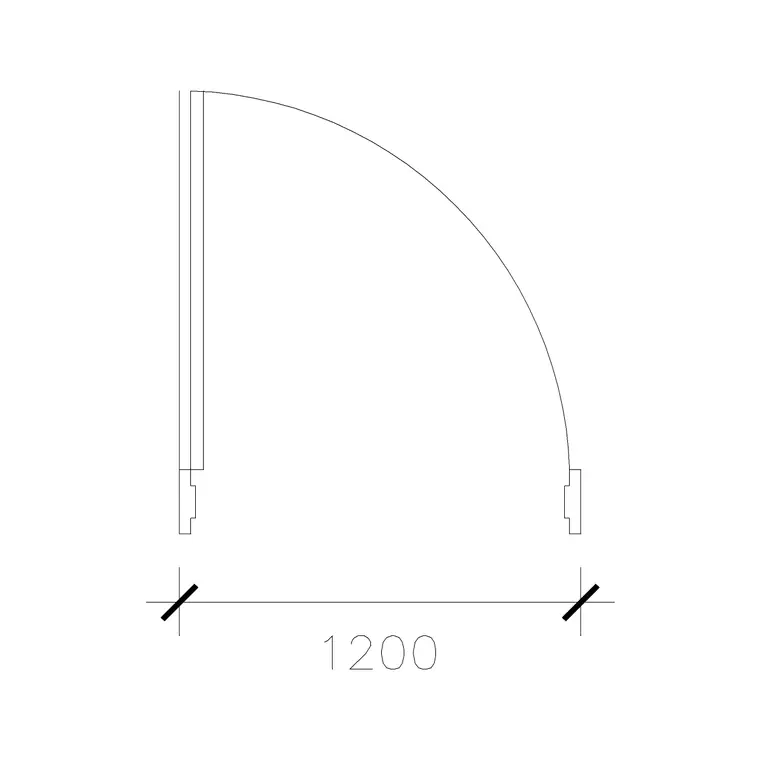
We carry several door blocks with the frame included as part of the drawing, for instance 700 Mm Laminated Door With Frame, 800 Mm Laminated Door With Frame & Lock and 900 Mm Laminated Door With Frame & Lock, and if you open one of those next to a plain leaf-only door plan the difference is obvious immediately, you can see the frame thickness drawn as a separate line set around the opening rather than just the leaf swing. That's genuinely useful as a starting reference for how a frame reads in plan, even though those are floor-plan-scale blocks and not a full 1:5 jamb detail, so treat them as the plan-level companion to a detail rather than a replacement for one.
A full jamb and head detail at a larger scale would also show the fixing method (screws through the frame into packers, or a proprietary frame anchor), the architrave profile, and how the frame meets the wall finish, whether that's plaster returning into the rebate or a separate trim piece. None of that is something a plan-scale block can show you, which is exactly why professional drawing sets always carry both a plan and a set of large-scale details for anything as junction-heavy as a doorway.
Fire-rated doors add yet another layer to the jamb detail specifically, though it's worth knowing about even if you're not detailing a fire door yourself. A fire-rated frame typically needs intumescent strips set into the rebate, material that expands under heat to seal the gap between leaf and frame, and the jamb detail has to show exactly where those strips sit and how the architrave is fixed without covering them up. It's a good example of how a detail that looks like a simple frame-in-wall junction from a distance can be carrying several separate performance requirements, weatherproofing, fire separation, acoustic sealing, all resolved in the same few centimetres of drawing.
Sliding and pocket doors: a different frame and threshold problem entirely
Everything covered so far assumes a hinged, swinging door, but sliding and pocket door types change the frame and threshold detail meaningfully, and it's worth knowing the difference before you assume one detail type applies universally. Our doors category includes several sliding and pocket configurations, 1000 Mm Door Type 1 Single Pocket Door and 1000 Mm Sl Dd among them, and if you compare the plan symbol for one of these against a standard hinged door plan the swing arc simply disappears, replaced by a track line showing the leaf sliding along the wall face or into a pocket built inside the wall itself.
At the threshold, a sliding door usually needs a track or guide channel recessed into the floor finish, which means the floor buildup detail has to account for that recess rather than the flat continuous threshold a hinged door needs, and at the jamb, a pocket door disappears entirely into a stud cavity built specifically to receive it, which is a framing detail closer to a piece of built-in carpentry than a simple frame-in-wall junction. Getting this distinction right early matters because retrofitting a pocket door into a wall that wasn't framed for one is a genuinely disruptive piece of work, so if a pocket door is even a possibility for a given opening, the wall framing detail needs to account for it from the start, not after the fact.
External door sill
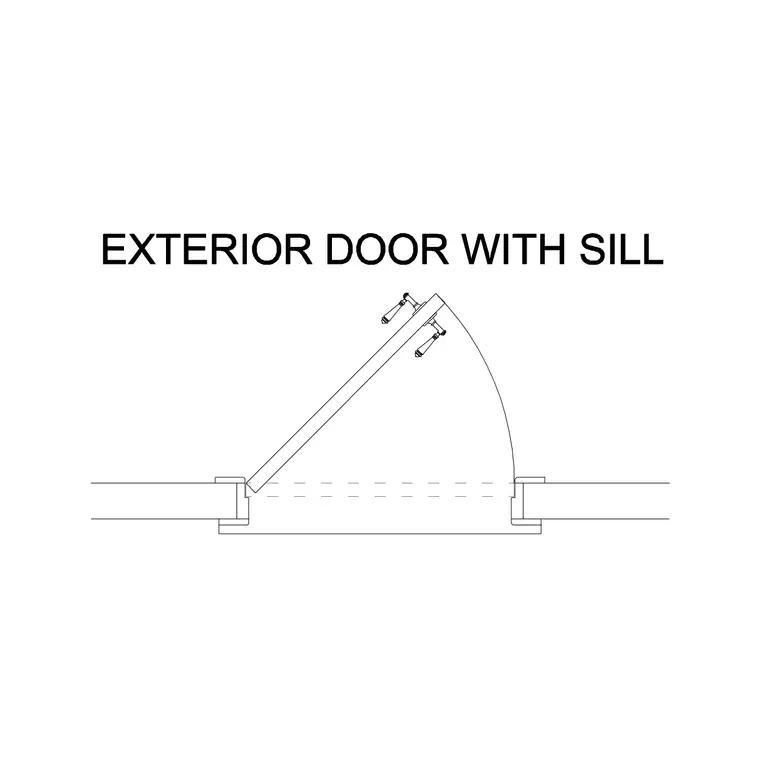
One product in our doors category is drawn specifically to show this junction: Exterior Door With Sill. It's worth opening on its own because it's one of the few blocks in the library where the sill condition is drawn as part of the block itself rather than left for you to add, so it's a genuinely useful quick reference for how an external sill sits relative to the door leaf even before you get into a full construction detail.
What you'll notice comparing it to an internal door type is that the sill line sits proud of the surrounding floor line, which is the drawn convention for a raised threshold, and that's the detail that in a full section would carry the slope and drip groove information. Using a block like this as your starting plan reference and then building your own large-scale section detail on top of it for the specific project is a reasonable, honest workflow, rather than assuming any single plan-view block is meant to double as a full weatherproofing detail.
Reading door sizes off real dimensions
Door widths in most catalogues, ours included, run from narrow types around 700mm up through 900mm, 1000mm, 1200mm and wider double-door types beyond that, and it's worth actually knowing what those numbers correspond to before you specify one. A single leaf around 700 to 800mm is typical for an internal room door, 900mm is a common accessible-width internal door, and 1000mm and above starts showing up for main entrances or anywhere step-free accessible access matters, which lines up with the kind of minimum clear-opening widths discussed generally under universal design and accessibility principles.
Our doors category holds 190 real, downloadable products across single, double, sliding, laminated and double-acting types, so if you're detailing a threshold and need the matching plan symbol to sit alongside it, chances are good there's a width and type in there that matches, rather than needing to redraw a leaf from scratch.
Common mistakes when detailing or reading a threshold and frame
The most frequent error I see, and one I've made myself early on, is drawing or accepting a threshold detail where the floor finish thickness doesn't actually add up against the frame rebate, so the door leaf either binds on the finished floor or leaves an oversized gap. Always trace the finished floor level line all the way through the detail and check it against where the door leaf's bottom edge actually sits.
- Missing damp-proof course at an external sill, which shows as a thin continuous hatch layer that's easy to omit by accident - Frame rebate width that doesn't match the leaf thickness specified elsewhere in the drawing set - No slope or drip detail on an external sill, which is a genuine water-ingress risk, not just a drafting nicety - Architrave or trim drawn without a real fixing method, leaving an ambiguous junction for the site team - Swing direction in the plan not matching the hinge side implied by the frame detail
Where the plan block and the construction detail fit together in a set
At the end of the day a full drawing package needs both pieces working together: the plan block gives you the leaf width, swing and location for coordination across the whole floor plan, and the large-scale threshold and frame detail gives the site team the actual buildable information, materials, fixings, waterproofing, that a plan simply isn't drawn at a scale to show. If you're building a set from our library, pull the door plan block that matches your specified width and type, place it correctly in the floor plan, and then build (or source separately) the large-scale detail for the specific frame and sill condition your project actually needs, because no free plan-view block on any site is meant to substitute for that detail.
Further reading
Questions
Frequently asked
Is a door threshold detail the same drawing as the door plan?+
No. The plan shows the leaf width and swing direction at a small scale for floor plan coordination. The threshold and frame detail is a separate, much larger-scale drawing (often 1:5 or 1:10) that shows the actual materials, sill, damp-proofing and fixings at that junction.
Do your door blocks include the frame detail?+
Some plan-view blocks, like the laminated door with frame products, do show the frame as part of the plan symbol, and Exterior Door With Sill shows a sill condition. These are plan-level references, not full large-scale construction sections, so use them alongside a separately drawn detail for anything that needs to go to site.
What door widths do you actually have as downloadable blocks?+
Our doors category has 190 real products spanning roughly 700mm through 1200mm and wider double-door types, in single, double, sliding, laminated and double-acting configurations.
Why does an external door sill need a slope and a drip groove?+
The slope moves rainwater away from the building rather than pooling against the frame, and the drip groove cut into the underside of the sill stops water tracking back underneath the frame by capillary action. Both are worth checking for on any external threshold detail.
Free downloads from this article
Free CAD block library
Download the blocks from this article — free, no signup

