Cycle Stand and Bike Rack Layout Dimensions
Practical spacing and clearance dimensions for cycle stand layouts, plus how to check them using real bicycle and paving CAD blocks.
Sumana KumarUpdated 15 May 202611 min read
Why cycle parking gets squeezed into leftover space, and shouldn't be
Cycle parking has a habit of being the last thing added to a site layout, squeezed into whatever awkward leftover strip is left between a bin store and a fence line, which is exactly backwards given how little space it actually needs compared to a car parking bay. A properly laid out cycle stand area earns its keep by being obviously usable, easy to wheel a bike into and lock without contorting around a neighboring bike, and the dimensions involved are modest enough that there's rarely a good excuse for getting them wrong.
It also tends to be one of the cheaper wins available on a site plan: a handful of well placed, well designed cycle stands cost a fraction of a single car parking bay in both area and construction cost, and a scheme that's genuinely easy to use is far more likely to actually get cycled to than one that technically satisfies a planning condition but sits half hidden and awkward to reach.
How many stands to actually plan for
The number of stands a site needs is usually set by a planning policy or building code tied to the building's use, floor area or expected occupancy, and the specific ratio varies enormously between jurisdictions and building types, an office scheme, a school and a residential block will typically be assessed against completely different cycle parking ratios even in the same city. So rather than working from a rule of thumb pulled from a different project, it's worth confirming the actual requirement for your specific building type and location early, since it directly determines how much of the total stand and aisle area covered in this article you actually need to fit on site.
It's also worth designing in some spare capacity beyond whatever the bare policy minimum turns out to be, since cycle commuting rates on a given site tend to grow over the life of a building rather than shrink, and retrofitting additional stands into an already tight layout later is a much harder problem than allowing a modest expansion zone from the outset. A shell area sized for, say, twenty percent more stands than the current requirement, left as simple hardstanding until it's actually needed, is a cheap piece of future proofing compared to trying to find that space once the rest of the site is already built out.
The basic footprint of one parked bicycle
A single parked bicycle, measured as the space it occupies once locked to a stand, typically needs somewhere around 1.8 to 2 meters of length, front wheel to rear wheel plus a little clearance, and somewhere around 0.6 to 0.8 meters of width per bike, though this widens noticeably for cargo bikes, bikes with panniers, or anywhere you're deliberately designing for a wider mix of cycle types. It's a much smaller footprint than a car bay, which is exactly why cycle parking often gets treated as an afterthought, the space required looks trivial next to the rest of a site layout, right up until you actually try to fit the stands, the access aisle and the swing clearance for someone leaning a bike in at an angle.
Handlebar width is worth factoring in separately from the bike's own length and body width, since it's the handlebars, not the frame, that most often clash with the neighboring bike in a tightly spaced run. A typical handlebar spans somewhere around 500 to 600mm, and it's this dimension, more than the tyre to tyre width of the bike itself, that actually sets the practical minimum spacing between two bikes parked side by side.
Stand type, spacing and the options beyond the basic hoop
The most common cycle stand type in a lot of markets is a simple inverted U or hoop stand, often called a Sheffield stand in the UK, which supports a bike at two points and lets a lock go through both the frame and a wheel, a meaningful security improvement over a simple wheel bender rack that only grips the front wheel. Spacing between adjacent hoop stands is typically somewhere around 800mm to 1 meter center to center where bikes park on alternating sides of each hoop, tight enough to fit a reasonable number of bikes in a run but wide enough that handlebars and pedals don't constantly clash between neighboring bikes.
The hoop stand is the most common general purpose choice, but it isn't the only option worth knowing. Wheel bender or toast rack style stands, which grip only the front wheel, take up less linear space per bike but offer noticeably weaker security since the frame itself often isn't properly supported or lockable, and they've fallen out of favor in a lot of secure cycle parking specifications for exactly that reason. Two tier stands, which stack a second bike above the first, pack more bikes into the same ground floor area but require enough lifting strength and clearance overhead to be usable, and are generally better suited to a controlled, semi commercial setting like an office basement than a public facing area where less able users may need to park too. Wall mounted or vertical hoop stands are a useful option in a genuinely tight space where even a standard hoop layout doesn't fit, though they typically only suit lighter bikes and shorter term use. Anywhere cargo bikes or bikes with child seats are expected, it's worth setting aside a distinct, wider bay rather than trying to force them into a standard hoop spacing designed around an ordinary bike's footprint.
Aisle width for one sided versus two sided access
Access aisle width in front of a row of stands depends on whether cyclists approach from one side only or from both. A one sided access aisle, where a wall or another obstruction sits directly behind the stands, typically needs somewhere around 1.2 to 1.5 meters of clear space to wheel a bike in and maneuver it into the stand. A two sided arrangement, where bikes park facing each other from stands set back to back, generally needs a wider central aisle, often in the 2 meter range or more, since two people may be maneuvering bikes from opposite directions at the same time.
Angling the stands rather than setting them dead perpendicular to the aisle is another way to trim the required aisle width slightly in a tight retrofit situation, since an angled bike sits more diagonally and needs less of a straight in approach, though this typically reduces how many stands fit in a given run length, so it's a trade off worth testing against your specific site constraints rather than assuming it's always the better option.
A worked example: fitting a compliant stand count into a tight side return
Say a small office redevelopment needs to fit twelve cycle stands into a narrow side return between the building and a boundary wall, a space that's long enough but only a little over two meters wide, tighter than the two sided aisle figure covered above would comfortably allow. In a case like this the practical answer is usually a single sided run against the boundary wall rather than trying to force a two sided back to back arrangement into a space that doesn't genuinely have the width for it, since a two sided layout squeezed below its proper aisle width just produces a row of stands nobody can actually use without repeatedly bumping the next bike along.
Lay the hoop stands out along the wall side at the roughly 800mm to 1 meter spacing covered earlier, check the resulting run length against the twelve stand target, and if it doesn't fit in the available length, that's the point to go back to the client with the actual numbers rather than quietly cramming the spacing tighter than the handlebar clearance genuinely allows. It's a far easier conversation to have at the drawing stage, here's the achievable stand count in the space available, and here's what a slightly wider allocation would let us fit, than to deliver a technically number matching layout that nobody can actually use without their pedals catching the next bike over.
Security and visibility
A cycle stand area that's technically compliant but poorly sited often ends up underused, and visibility is usually the deciding factor: stands placed within clear sight of a building entrance, a staffed reception, or a well used pedestrian route feel safer to lock a bike in for the working day, while stands tucked around the back near a service yard, even if the dimensions are identical, tend to see lower use and higher theft rates. Good lighting across the stand area, and ideally within a reasonable sightline of any site CCTV coverage, are worth factoring into the layout decision alongside the pure dimensional requirements covered elsewhere in this guide.
A quick, honest test at design stage is worth running: would you actually leave your own bike locked here for a full working day. If the answer is genuinely no because the spot feels hidden or exposed, it's worth moving the stands before construction rather than after a low usage rate confirms the same thing on a completed site.
It's worth applying the same honest test to weather exposure as to security, not just whether you'd lock your own bike here, but whether you'd still choose to on a wet, windy evening in the depths of winter, since a stand area that only gets used in good weather isn't really solving the problem a cycle parking requirement is there to solve in the first place. A modest canopy, covered further below, does a lot of work here, but even without one, simply orienting the stand run so the prevailing wind and rain driven weather hits it from behind rather than head on can noticeably improve how usable the space feels through a typical winter.
Covered and sheltered cycle parking
Sheltering cycle parking, even a simple cantilevered canopy, meaningfully increases how much a cycle stand area actually gets used, since a bike left out in the weather deteriorates faster and is a less appealing option for a daily commuter. This is more of a site planning and roofing detail than a CAD block question for our purposes, but it's worth factoring the canopy structure's footprint and any support posts into your stand spacing early, since a post placed without checking clearance can end up blocking exactly the aisle width you calculated for bike access.
A cantilevered design, supported only from one side rather than with posts along the open edge, is worth considering specifically where the stand area is tight, since it keeps the whole access aisle genuinely clear rather than interrupting it with a regular run of support posts every few meters.
Where a canopy is specified, it's worth checking the clearance height against someone wheeling a bike upright underneath it, generally comfortable at a canopy height in the 2.2 to 2.4 meter range or higher, and making sure the canopy actually sheds rainwater away from the stands rather than funneling it directly onto the saddles, a surprisingly common detail failure on a first draft roof design that only becomes obvious once it's raining.
Checking layouts with real bicycle CAD blocks
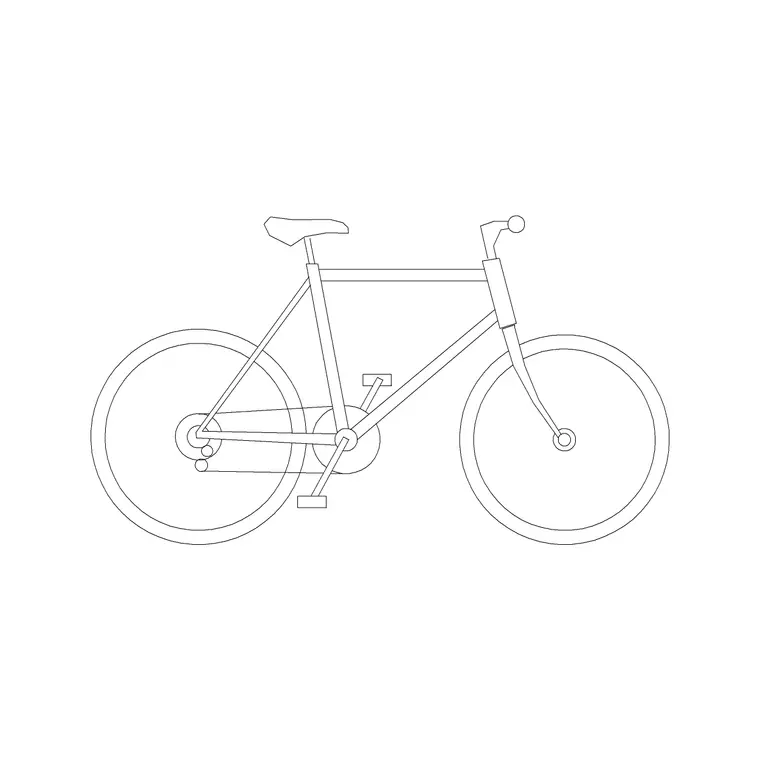
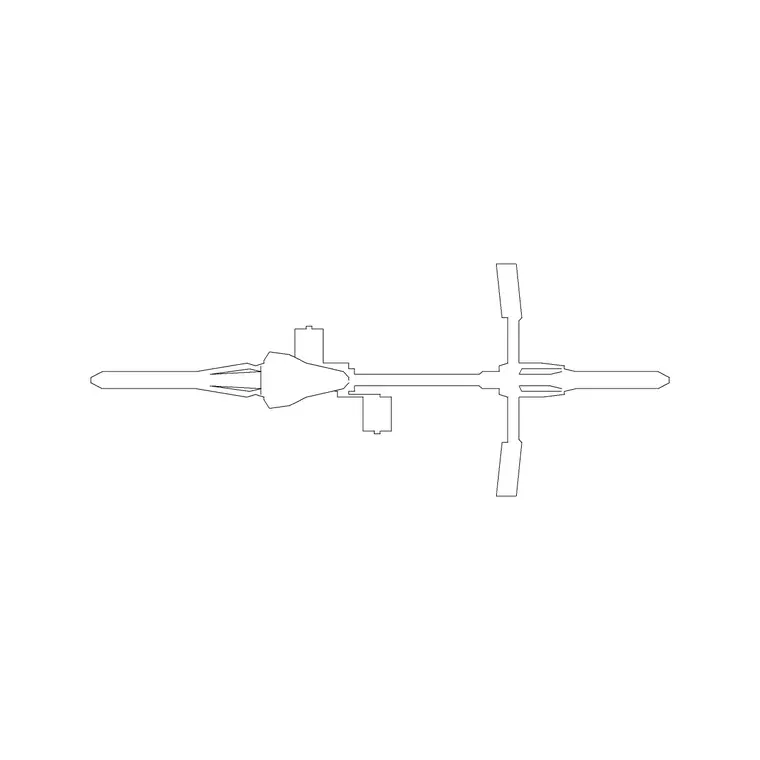
This is one of the few posts in this guide where our catalogue has a genuinely direct match rather than a rough stand in: our bicycle elevation and bicycle plan blocks are real, downloadable bike outlines you can drop straight into a stand layout to check spacing and clearance against an actual bike footprint rather than a generic rectangle. Lay several copies of the bicycle plan block into your stand grid at the spacing you've specified and you'll see immediately whether handlebars clash between adjacent bikes, or whether the aisle width you've drawn actually lets someone wheel a bike in at a realistic angle rather than dead straight. For the surrounding hardstanding, our paving blocks, paving-block-1 or paving-block-3, are a straightforward way to represent the finished surface under and around the stands.
The bicycle elevation block is worth using alongside the plan view too, particularly for checking a canopy or overhead obstruction, since it's the elevation that actually shows you whether a raised handlebar or an upright rider clears a low beam or a sloped roofline, a check the plan view alone simply can't do.
Common mistakes
- Sizing a cycle stand area purely off a headline number of bikes required figure without checking the access aisle actually works at that spacing - Placing a shelter post inside the calculated access aisle rather than outside it - Using wheel bender rack spacing, which needs less width, as a stand in for hoop stand spacing, which typically needs more - Squeezing cycle parking into a leftover corner without checking sightlines from the building entrance, so it goes unused because nobody can see it's there - Assuming a single generic cycle parking ratio applies everywhere rather than confirming the actual requirement for your specific building type and location - Choosing a wheel bender rack purely to save space in a public facing area where the weaker security it offers is a genuine deterrent to use - Sizing every bay to an ordinary bike's footprint and leaving no wider provision anywhere for a cargo bike or a bike with a child seat
Further reading
Questions
Frequently asked
How much space does one parked bicycle need?+
Typically somewhere around 1.8 to 2 meters of length and 0.6 to 0.8 meters of width per bike, though cargo bikes and bikes with panniers need more.
How far apart should cycle stands be spaced?+
For common hoop or Sheffield style stands with bikes alternating sides, spacing is typically around 800mm to 1 meter center to center.
How wide should the access aisle in front of cycle stands be?+
Around 1.2 to 1.5 meters for one sided access against a wall, widening to roughly 2 meters or more for a two sided, back to back arrangement.
Do you have bicycle CAD blocks?+
Yes. Our bicycle elevation and bicycle plan blocks are real downloads you can use directly to check stand spacing and aisle clearance against an actual bike footprint.
Free downloads from this article

Free CAD block library
Download the blocks from this article — free, no signup


