Chandelier blocks by hanging height for a stairwell drawing
How to pick a chandelier block for a stairwell by hanging height, from a low residential void to a genuine double height space.
Sumana KumarUpdated 2 July 20265 min read
Hanging height, not fixture style, is the first filter
When a project has a stairwell chandelier on the lighting schedule, the first question I ask is not which style the client wants, it is how much vertical clearance the void actually gives me, because hanging height is the constraint that eliminates most of the block options before style ever enters the conversation. Sort the decision by hanging height first and the right block usually becomes obvious, and the client conversation about style becomes a lot shorter once only a handful of genuinely suitable options remain on the table.
Under 3 metres: skip the long suspension entirely
If the stair void is under about 3 metres of clear height, which covers a lot of standard two storey residential stairs, a long suspended chandelier will almost always look cramped, there simply is not enough vertical room for a meaningful drop before you start eating into headroom over the stair itself. In that range, the round chandelier block or even the ceiling lamp block, hung close to the ceiling with minimal drop, reads far more proportional and keeps clearance safely above anyone's head on the treads below.
3 to 5 metres: this is the long suspended chandelier's zone
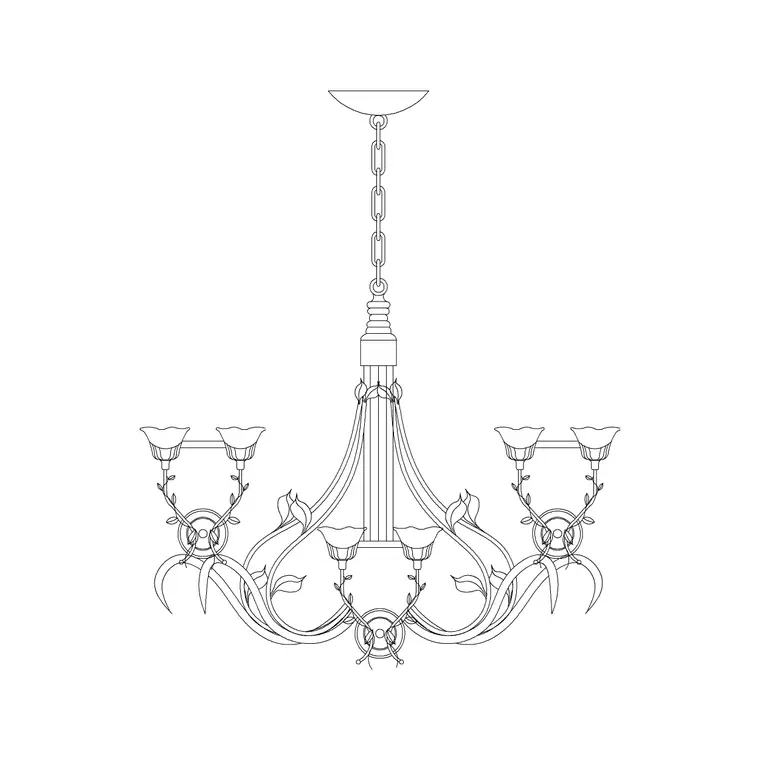
Once you are in the 3 to 5 metre range, a genuine two storey stair void or a tall single volume space, the Long Suspended Chandelier Metal Type A block starts to make real sense, since there is enough height to let the drop compose as a deliberate design element rather than a compromise. In this range I typically stretch the rod segment so the fixture's bottom sits with clear headroom above the lowest tread or landing, consistent with your project's stair headroom requirement, while still leaving visible chain or rod length above the fixture head so it reads as intentionally suspended rather than just low.
This middle band is also where I get the most pushback from clients who saw a photo of a much taller void online and want the same dramatic drop in a space that is honestly closer to 3.5 metres than 5. In those conversations I find it helps to physically mark the proposed drop height on site with a tape measure or a string line before finalising the block, since a number on a drawing rarely lands the same way as seeing the actual height in the room, and it is a lot cheaper to adjust a CAD block than to reorder a fixture after installation.
Over 5 metres: consider more than one fixture
Above roughly 5 metres, a genuinely grand double or triple height void, a single chandelier can start to look lonely against that much empty vertical space, and this is where I will sometimes specify a cluster, two or three suspended fixtures at staggered drop heights rather than one long single fixture, or pair one large suspended chandelier with wall lamp blocks running down the stair at each landing so the lighting scheme fills the volume rather than leaving one small bright point at the top of a very tall shaft.
Checking headroom is not optional
Whatever hanging height you land on, cross check it against your local building regulation's minimum headroom requirement over a stair, since that number varies by jurisdiction and by whether the stair is a primary means of escape. This block gives you the drafting geometry, the drop length, the fixture proportions, but the actual clearance sign off has to come from your project's own code compliance check, not from a rule of thumb in an article.
On projects where the stair is a required means of escape, headroom compliance tends to get checked closely during building control review, so it is worth flagging the fixture's lowest point on your section drawing with a dimension line and a note rather than leaving it as an assumption buried inside the block geometry, since a reviewer looking at a section wants to see that number called out explicitly, not have to measure it off the drawing themselves.
Getting the drop dimension right in the file
Whichever hanging height you settle on, grip stretch the rod portion of the suspended chandelier block to match, keeping the fixture head geometry untouched so proportions stay correct, insert at the ceiling datum with INSERT rather than copy paste, and dimension the drop clearly on the elevation or section so anyone reviewing the drawing, or an electrician on site, does not have to guess where the block's default length ends and your project specific adjustment begins.
On a larger commercial or hospitality project where a stairwell chandelier is one of dozens of fixtures being tracked, it is worth considering whether the job has moved to a building information modeling workflow for exactly this reason, since BIM keeps a fixture's position, drop, and even its manufacturer data attached to one object referenced across every drawing, cutting down a lot of the manual cross checking this article describes. For a smaller residential job running on straight 2D DWG files, the tiered approach above plus a disciplined dimension note on the section drawing gets you almost the same coordination benefit without the overhead of standing up a full model. Either way, the underlying decision about hanging height and clearance is the same conversation, only the tooling used to keep it coordinated across the drawing set changes with the size and complexity of the job.
A three tier decision you can apply on any project
If it helps to have a single mental shortcut rather than re deriving this every time, think of stair chandelier hanging height in three tiers. Tier one, under 3 metres, go flush or shallow drop, round chandelier or ceiling lamp, nothing that tries to hang low into the stair volume. Tier two, 3 to 5 metres, one long suspended fixture with a real, visible drop, centred on the void rather than the walls. Tier three, over 5 metres, either a taller single fixture with a genuinely long drop or a cluster of two to three fixtures at staggered heights, paired with wall lighting down the stair run so the whole volume feels lit rather than just the top of it. None of these tiers are fixed rules, a striking design might deliberately break the pattern, but as a starting point before the design conversation happens, sorting by tier gets you to a sensible first draft fast, and it is the same mental model I reach for on nearly every stairwell lighting layout regardless of the overall style of the project.
Further reading
Questions
Frequently asked
What stair void height actually needs a long suspended chandelier?+
Roughly above 3 metres of clear void is where a long suspended fixture starts to compose well; below that, a round chandelier or flush ceiling lamp usually reads more proportional.
How do I know my chandelier has enough headroom over the stair?+
Check your local building regulation's minimum stair headroom requirement and dimension the fixture's lowest point against it directly on your section drawing, do not rely on a general rule of thumb.
Can I use more than one chandelier block in a single tall stairwell?+
Yes, staggering two or three suspended fixtures at different drop heights, or pairing one large fixture with wall lighting down the stair, often reads better than one fixture trying to fill a very tall void alone.
Free downloads from this article


Free CAD block library
Download the blocks from this article — free, no signup