Checking a CAD block's insertion base point before placing it
The insertion base point decides where a block anchors on click. Here's how to check it before placing, and how to fix one that lands in an awkward spot.
Sumana KumarUpdated 22 March 20266 min read
The setting nobody thinks about until it's wrong
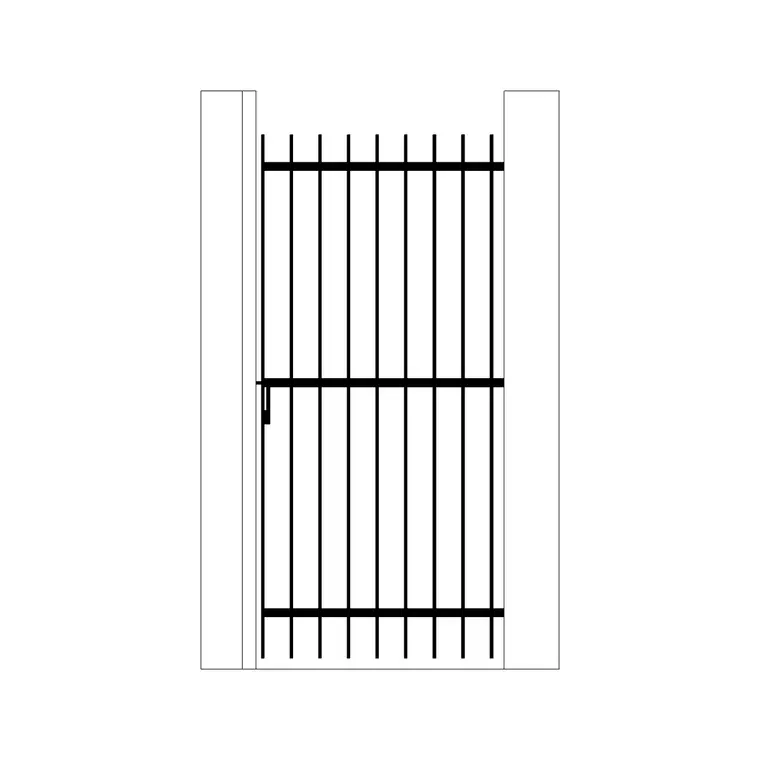
Here's a scenario that's happened to basically every drafter at some point: you insert a gate block, click on the wall line where it should sit, and the gate appears shifted a full panel-width off to the side, hanging in space rather than sitting flush with the opening. Nothing is broken, the block itself is fine, it's just that its insertion base point isn't where you assumed it would be. That base point is the single coordinate inside the block that lands exactly on the point you click during insertion, and if you don't know where it sits before you place the block, you're guessing every single time.
Where the base point should actually sit, by block type
For a door or gate block like the Iron Gate, the base point should almost always sit at one jamb, the hinge side typically, so that clicking on the wall opening's edge places the gate flush against it immediately, ready to rotate into the opening direction. For a furniture block like a sofa, the base point commonly sits at a back corner or the geometric center, either works, but center tends to make repositioning against a wall slightly more intuitive since you can nudge it visually rather than doing math. For a wall-mounted fixture like the Wall Lamp, the base point should sit at the wall-contact edge of the fixture, not the outer tip, because you're almost always snapping that point to a wall face when you place it.
How to check it before you insert
Open the block file on its own and look for a small X marker or a UCS icon sitting somewhere on or near the geometry, that's the base point, and most well-built blocks leave it visible at the origin or at a clearly logical spot. If you can't spot it visually, run the BASE command while the block file is open, which reports and lets you reset the current base point, and check what coordinate it's currently set to relative to the geometry. Alternatively, insert the block once into a scratch drawing at a known point, like 0,0, and see exactly where the geometry lands relative to that point, which tells you immediately where the base point sits without needing to hunt for a marker.
A quick trick I use for gate and door blocks specifically is to insert once at 0,0 and then run DIST from the origin to the nearest jamb edge. If that distance reads as basically zero, the base point is sitting right at the jamb, which is exactly where you want it for a clean snap into a wall opening. If it reads as some larger offset, you now know exactly how far off the block will land relative to where you click, which is useful information even if you decide not to fix it permanently.
Here's how that actually plays out with a real block. Say I've downloaded a new gate model and I want to check its base point before using it on a live project. I insert it once at 0,0 in a blank scratch drawing, then run DIST from the origin to the nearest hinge jamb edge. If that reads something like 2mm, essentially zero for drafting purposes, I know the base point is sitting right where I want it and I can insert this block directly onto a wall opening edge with confidence. If instead it reads 380mm, I now know the block will land 380mm off from wherever I click every single time, which I can either compensate for manually on every insertion or, more sensibly, fix once in BEDIT so I never have to think about it again.
Fixing a base point that's in the wrong place
If a block's base point is sitting somewhere unhelpful, the middle of empty space, an odd corner that doesn't correspond to anything you'd naturally snap to, you can fix it permanently. Open the block in the Block Editor (BEDIT), and use the Base Point parameter tool from the Block Authoring palette to relocate it to wherever makes sense, then save the block definition. From then on, every future insertion of that block uses the corrected point. This is worth doing once for any block you'll reuse repeatedly across projects, since a five minute fix now saves you from repeatedly nudging the block into place by eye every time you insert it for the rest of your career.
Object snap tracking makes a good base point pay off even more
Once a block's base point is sitting somewhere sensible, pairing that with AutoCAD's object snap tracking turns placement from a careful manual task into something close to automatic. Insert a gate block with its base point at the hinge jamb, hover near a wall opening's edge with running OSNAP endpoint active, and the block practically places itself exactly where it belongs, no eyeballing, no post placement nudge. This is the compounding payoff of getting the base point right in the first place, right, it's not just that one insertion goes faster, it's that every future insertion of that same block, potentially dozens of them across a career of projects, gets faster too, for a fix that took maybe five minutes one time in the Block Editor.
Why this matters more for some blocks than others
For instance, a simple decorative block, a tree symbol, a north arrow, the base point barely matters because you're placing it by eye anyway and a slight offset doesn't affect anything functional. But for anything that has to align precisely with existing geometry, a door or gate into a wall opening, a wall lamp onto a wall face, a kitchen appliance against a run of cabinetry, the base point is doing real work every time you place it. Get it wrong and you're either fighting the offset on every single insertion or, worse, not noticing the small misalignment until it's already dimensioned and someone else catches it in review.
I learned this one the expensive way on an early project, inserting a run of maybe fifteen wall lamps along a corridor elevation, each one placed by eye because the base point sat at the fixture's outer tip rather than its wall-contact edge. Every single lamp needed a small manual nudge after placement to actually sit flush against the wall face, fifteen tiny corrections that added up to a genuinely annoying twenty minutes I didn't need to spend. Fixing that block's base point once in the Block Editor afterward meant every future insertion of that same fixture snapped straight to the wall with zero adjustment, and that's really the whole case for doing this check early rather than living with the workaround forever.
The habit worth building
At the end of the day, checking a block's base point takes about as long as checking its scale, and it belongs in the same pre-insertion routine. Open it, glance for the base point marker or run a quick BASE check, and if it's not where you'd want it, fix it once in the Block Editor rather than compensating for it on every project going forward. It's a small thing that quietly makes every future insertion faster and more accurate.
One more habit worth mentioning: if you're placing a block dozens of times across a single drawing, a run of gate posts or repeated wall lamps along a corridor, a well-placed base point paired with object snap tracking turns what would otherwise be a slow, careful placement into a fast, repeatable one. That's really the whole payoff of getting the base point right in the first place, speed and predictability multiplied across every future use.
Further reading
Questions
Frequently asked
What is a block's insertion base point?+
It's the single coordinate inside a block's geometry that lands exactly on the point you click during insertion. Everything else in the block is placed relative to that anchor, so its location determines how naturally the block snaps into position.
How do I check where a block's base point is set?+
Open the block file standalone and look for a small marker near the geometry, or run the BASE command to see and reset the current point. You can also insert it at a known coordinate like 0,0 in a scratch drawing to see where the geometry lands relative to that point.
Can I permanently change a block's base point?+
Yes. Open the block in the Block Editor with BEDIT, use the Base Point tool from the Block Authoring palette to move it, then save the definition. Every future insertion of that block will use the corrected point from then on.
Free downloads from this article


Free CAD block library
Download the blocks from this article — free, no signup
